
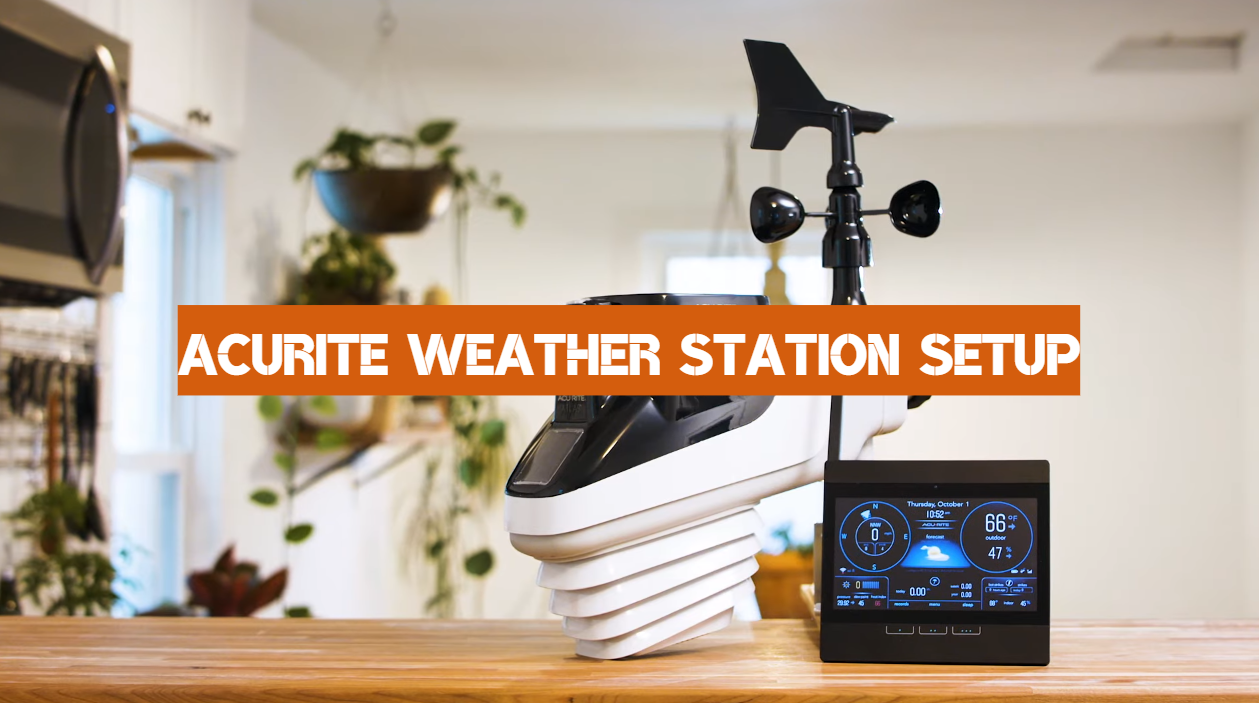
Setting up your Acurite weather station can be a daunting task. Between the many different sensors and components, it’s easy to become overwhelmed. In this guide, we will walk you through the entire process step-by-step, from unpacking to calibration. We will also answer some of the most common questions about Acurite weather stations, so that you can have your station up and running in no time!
Table of Contents
What is Acurite Weather Station?
Acurite Weather Station is one of the most popular home weather stations on the market. It is simple to set up and use, and it provides accurate readings for temperature, humidity, barometric pressure, wind speed, and more. Additionally, the Acurite Weather Station can be connected to a computer or smartphone for even more detailed data tracking and analysis.
Weather stations are useful for many different purposes. They can be used to track the weather for a specific location, to monitor the climate of an area, or even to predict the weather for a future date. Additionally, weather stations can be used as part of a security system to monitor for extreme weather conditions such as hurricanes, tornadoes, or severe thunderstorms.
The Acurite Weather Station is a great choice for anyone looking for an easy-to-use and accurate home weather station. It is also affordable, making it a great option for budget-conscious shoppers. With so many features and benefits, it’s no wonder that the Acurite Weather Station is one of the most popular choices on the market.
Setting up Acurite Weather Station
Now that you know a little bit more about the Acurite Weather Station, it’s time to learn how to set it up. The process is relatively simple, and there are only a few things that you need to do in order to get started.
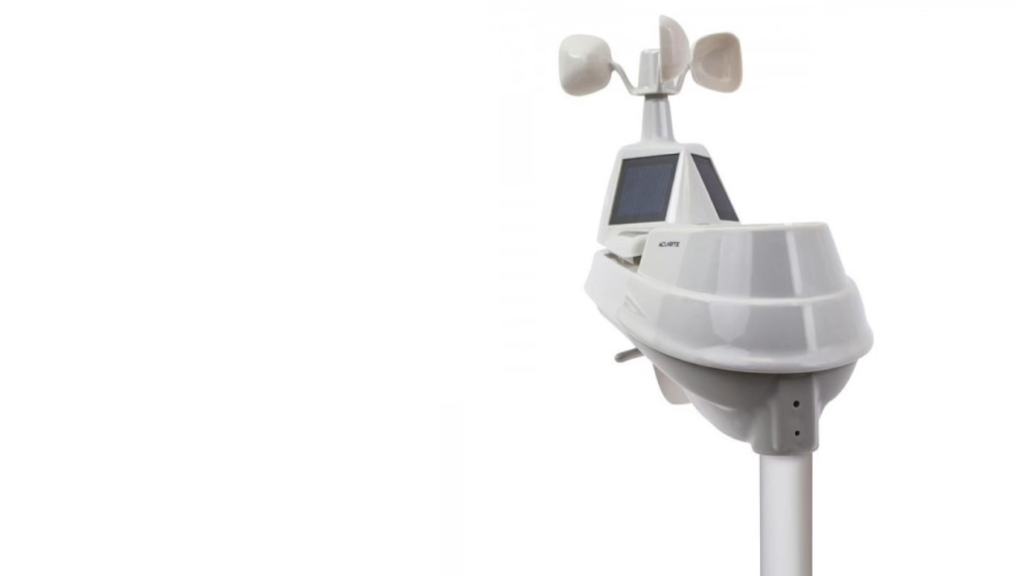
Outdoor Sensor
We shall start with the sensor because that is the most important part of the station.
Additionally in some models, the outdoor sensor can be connected to a computer or smartphone for even more detailed data tracking and analysis.
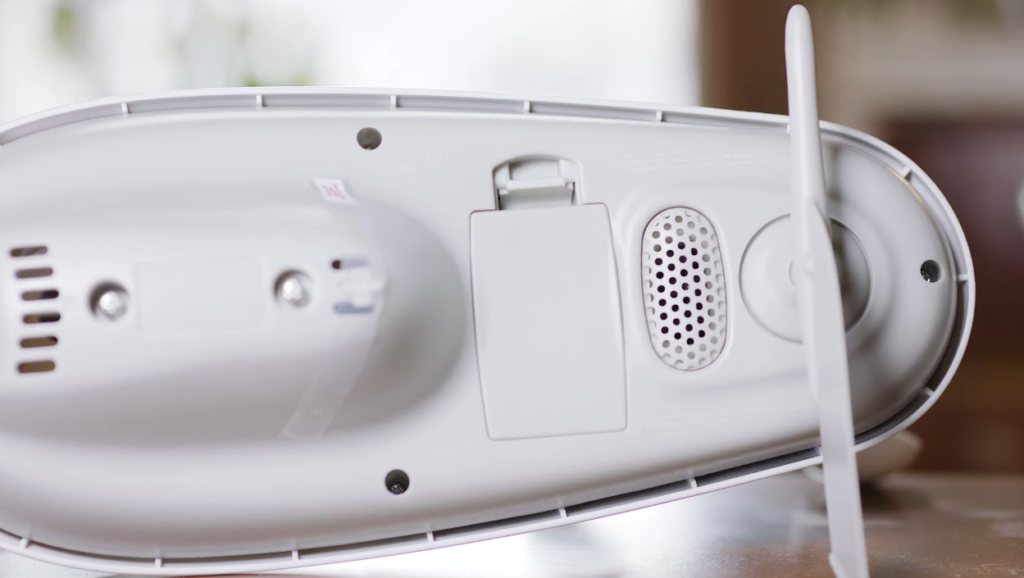
Remove the battery cover
Before you can begin setting up your Acurite Weather Station, you need to remove the battery cover from the outdoor sensor. To do this, simply lift up on the tab located at the top of the battery cover and then pull it away from the sensor. Once the cover is removed, you will see a small compartment that houses the batteries.
Insert 2 x AA batteries correctly
Next, you need to insert two AA batteries into the compartment. Make sure that the batteries are inserted correctly by following the diagram on the inside of the battery cover. Once the batteries are inserted, replace the battery cover and snap it into place.
Now that the batteries are inserted, the outdoor sensor is ready to be placed outside. [1], [2]
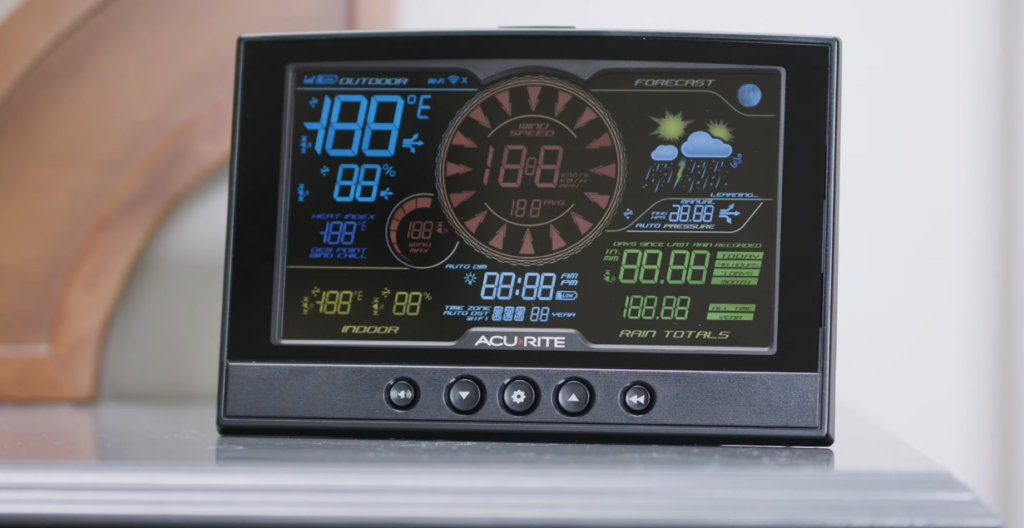
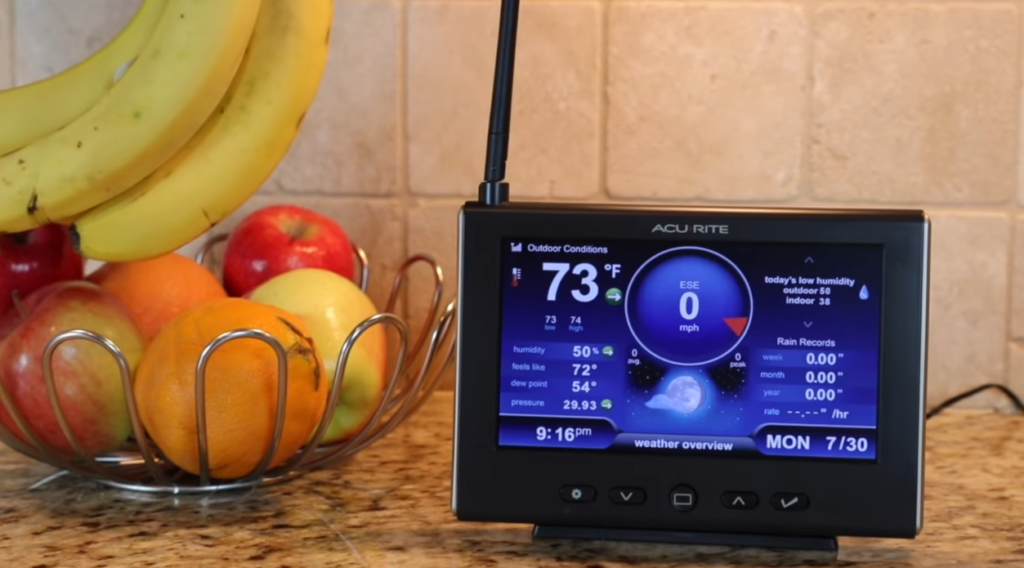
Display Unit
Now let’s move on to the display unit, which is the part of the Acurite Weather Station that you will interact with on a daily basis. The display unit shows all of the data that is collected by the outdoor sensor, and it also allows you to access additional features such as setting alarms or viewing historical data.
Like the outdoor sensor, the display unit also runs on batteries. However, unlike the outdoor sensor, you will need 3 x AAA batteries for the display unit.
Once the batteries are inserted, replace the battery cover and snap it into place. Now that the batteries are inserted, you can move on to the next step! [1], [2]
Setting up Intelli-Time Clock
One of the best features of the Acurite Weather Station is the Intelli-Time Clock, which automatically adjusts for Daylight Saving Time. The process for setting up the Intelli-Time Clock is relatively simple, and only takes a few minutes to complete.
Select your time zone and daylight saving time
First, you need to select your time zone and whether or not you want the clock to adjust for daylight saving time. To do this, press and hold the “Set” button and enter the SETUP mode.
Next, select the “Time Zone” option and use the arrow buttons to scroll through the list of time zones. Once you have found your time zone, press the “Set” button to select it.
Then, select the “Daylight Saving Time” option and use the arrow buttons to choose whether or not you want the clock to adjust for daylight saving time. Once you have made your selection, press the “Set” button to confirm.
Now that you have selected your time zone and daylight saving time settings, you can exit the SETUP mode by long pressing the “Set” button again. The Intelli-Time Clock is now set and ready to go! [1], [2]
Set the Date, Time and Prefered Temperature Units
Now it’s time to start configuring your Acurite Weather Station! The first thing you need to do is set the date, time and preferred temperature units.
Similarly like in the last step, press and hold the “SET” and simply edit the date, time and units settings according to your preferences. Once you are finished, press the “SET” button again to confirm your changes and exit the SETUP mode. [1], [2]
Connect to Acurite App
You will also need to connect your weather station to the Acurite app in order to access all of its features.
Now, connect to the Wi-Fi signal coming from your display either on mobile or laptop. Next, type 192.168.4.1 in your browser’s address bar and press Enter. This will take you to the Acurite settings page.
Click on the “Wi-Fi” tab and enter your Wi-Fi network’s SSID (name) and password. Once you have done this, click on the “Apply” button.
Your Acurite Weather Station will now connect to your Wi-Fi network and you will be able to access all of its features!
You now can reconnect to your home Wi-Fi network and open the Acurite app. In the app, you will need to create an account (if you don’t have one already) and then add your device. [1], [3]
Where to Place Your Sensor for the Best Accuracy
After you have successfully configured your station and connected it to the Acurite App, you might be wondering where is the best place to put it for the most accurate readings. There’s a lot of factors that can affect the accuracy of your readings, but following these general guidelines should help you get the most precise information possible:
Place your sensor away from direct sunlight
The sensor should be placed in a location where it will not be in direct sunlight, as this can cause the readings to be inaccurate. Try to place it in a shady area, or if that’s not possible, make sure to position the sensor so that the sun is not shining directly on it.
You should also avoid placing it away from any vents, fans, or other sources of moving air, as this can also affect the readings.
Make sure there’s an acceptable distance between display and sensor
In order for the sensor to correctly transmit data to the display, it is important that there is an acceptable distance between them. The recommended distance is about 165 feet, but this can vary depending on your specific model.
Place your sensor away from any potential obstacles
Your sensor needs to have a clear view of the sky in order to get accurate readings. If you place it too close to trees, buildings, or other obstacles, you might get readings that are lower than they should be.
The ideal placement for your sensor is on a tall pole or roof, but if that’s not possible, try to put it as high up as you can. The higher it is, the better view it will have of the sky.
Another thing to keep in mind is that your sensor needs to be in a location where it won’t be affected by other electronic devices. If you place it too close to things like WiFi routers or cell phone towers, it might interfere with the readings. [1], [2]
Where to Place Your Display
Finally, you’ll need to decide where to put your display. There’s little to no configuration required for the display, so you can pretty much put it anywhere you want. However there are some tips you might want to consider.
Place it in a dust-free environment
Since the display is electronic, it’s important to keep it in a clean environment. Try to avoid placing it in an area where there might be a lot of dust or other particles in the air. Also, if you’re going to be using your display outdoors, make sure to protect it from the elements. A good way to do this is to put it in a waterproof case.
Always place your display upright
You should always place your display upright so that you can easily see the readings. If you place it on its side or upside down, the readings will be harder to see. Also, make sure that the display is in a location where it won’t be in direct sunlight, as this can cause the screen to become difficult to read. [1], [2]
FAQ
How do I setup My AcuRite weather station?
Assuming you have already assembled your station and installed the batteries, setting up your AcuRite weather station is a relatively straightforward process. First, you will need to insert the batteries into the display console and sensor. Next, select your timezone and set the current time and date.
Once the time and date are set, place your sensor in a location that is away from trees, buildings, or other obstructions. It is important to ensure that your sensor has a clear line of sight to the sky. For best results, we recommend placing your sensor on a tripod or elevated surface.
How do I reset My AcuRite weather station?
If you need to reset your AcuRite weather station, there are a few different ways to do it. The first way is to find the reset button inside a battery compartment and press it for five seconds.
Another way to reset your AcuRite weather station is to remove the batteries for a few minutes and then put them back in. This will also usually clear any errors and allow the unit to function properly again.
Why can’t I connect My AcuRite weather station to WiFi?
If you’re having trouble connecting your AcuRite weather station to WiFi, there are a few things you can try:
- Make sure that the password for your network is correct.
- Try moving your router closer to the weather station.
- If you’re using a dual-band router, try connecting the weather station to the other band.
- Check to see if there are any firmware updates available for your router or weather station.
- Restart both your router and weather station.
Once you’ve tried all of these troubleshooting steps, you should be able to connect your AcuRite Weather Station to WiFi without any problems!
How do you set up AcuRite 5 in 1 weather station?
First, you’ll need to install the batteries in the sensor console and transmitter. Next, locate a level spot outdoors where you want to place the sensor console. The ideal location is one that is free from obstructions like trees or buildings, which could impede the wireless signal between the sensor and transmitter.
Once you’ve found a suitable location, mount the sensor console onto the provided stand or tripod. Then, simply insert the AC power adapter into the back of the console and plug it into an outlet. The console will automatically power on and begin wirelessly transmitting data to the display.
Now, simply plug the AC power adapter into the back of the display unit and plug it into an outlet. The display will automatically power on and connect to the sensor console, at which point it will begin displaying real-time weather conditions from your AcuRite Weather Station!
Useful Video: AcuRite Weather Station Setup and Install
Conclusion
Acurite weather stations are easy to set up and use. But sometimes it’s better to double check the process to be sure everything is done correctly. This guide should help you understand the process of setting up your Acurite Weather Station. We have explained everything from the initial setup process to placement tips. If you have any questions that were not answered in this guide, please feel free to reach out to us and we would be happy to assist you further. Thank you for reading and we hope this was helpful!
References
- https://images.homedepot-static.com/catalog/pdfImages/73/7302ab4e-4833-4005-bc1d-cd86c1249853.pdf
- https://manuals.plus/accurite/weather-station-manual
- https://support.acurite.com/hc/en-us/articles/360050596233-Direct-to-Wi-Fi-Weather-Station-Setup-